Instructions to create an Alias on Gmail
Sometimes when we are starting a new company, we tend to go one of two different ways with our email management:
Having our own domain and different emails for each required job.
Using our personal email to attend every part of the business.
These solutions might work at the beginning, but in the long term doesn’t allow much room to organize old work and projects. This can result in a lack of information system and unnecessary costs.
The solution we recommend for this is using aliases on your business domain. Alias are created to personalize general emails in the company. You can create just an email called “Info@mycompany.com” and create different aliases depending on the tasks. If this is an email that one person uses, you can create an alias with the name “sean@mycompany.com” and if he leaves the company you just delete the alias and create a new one without deleting all the information stored. This way clients have a better understanding of the people that they are talking to and can develop a personal connection.
Another way of using aliases is creating different general emails such as “Sales@mycompany.com” and “Support@mycompany.com” and making them go to the same inbox. This is a powerful way to organize activities in the same email address.
This is the process for creating new aliases on your company’s account:
Note: Before using the settings in your email account, it’s necessary that the administrator of the Gsuite account creates an Alias for you in the admin console. This is the process.
The process is as follows:
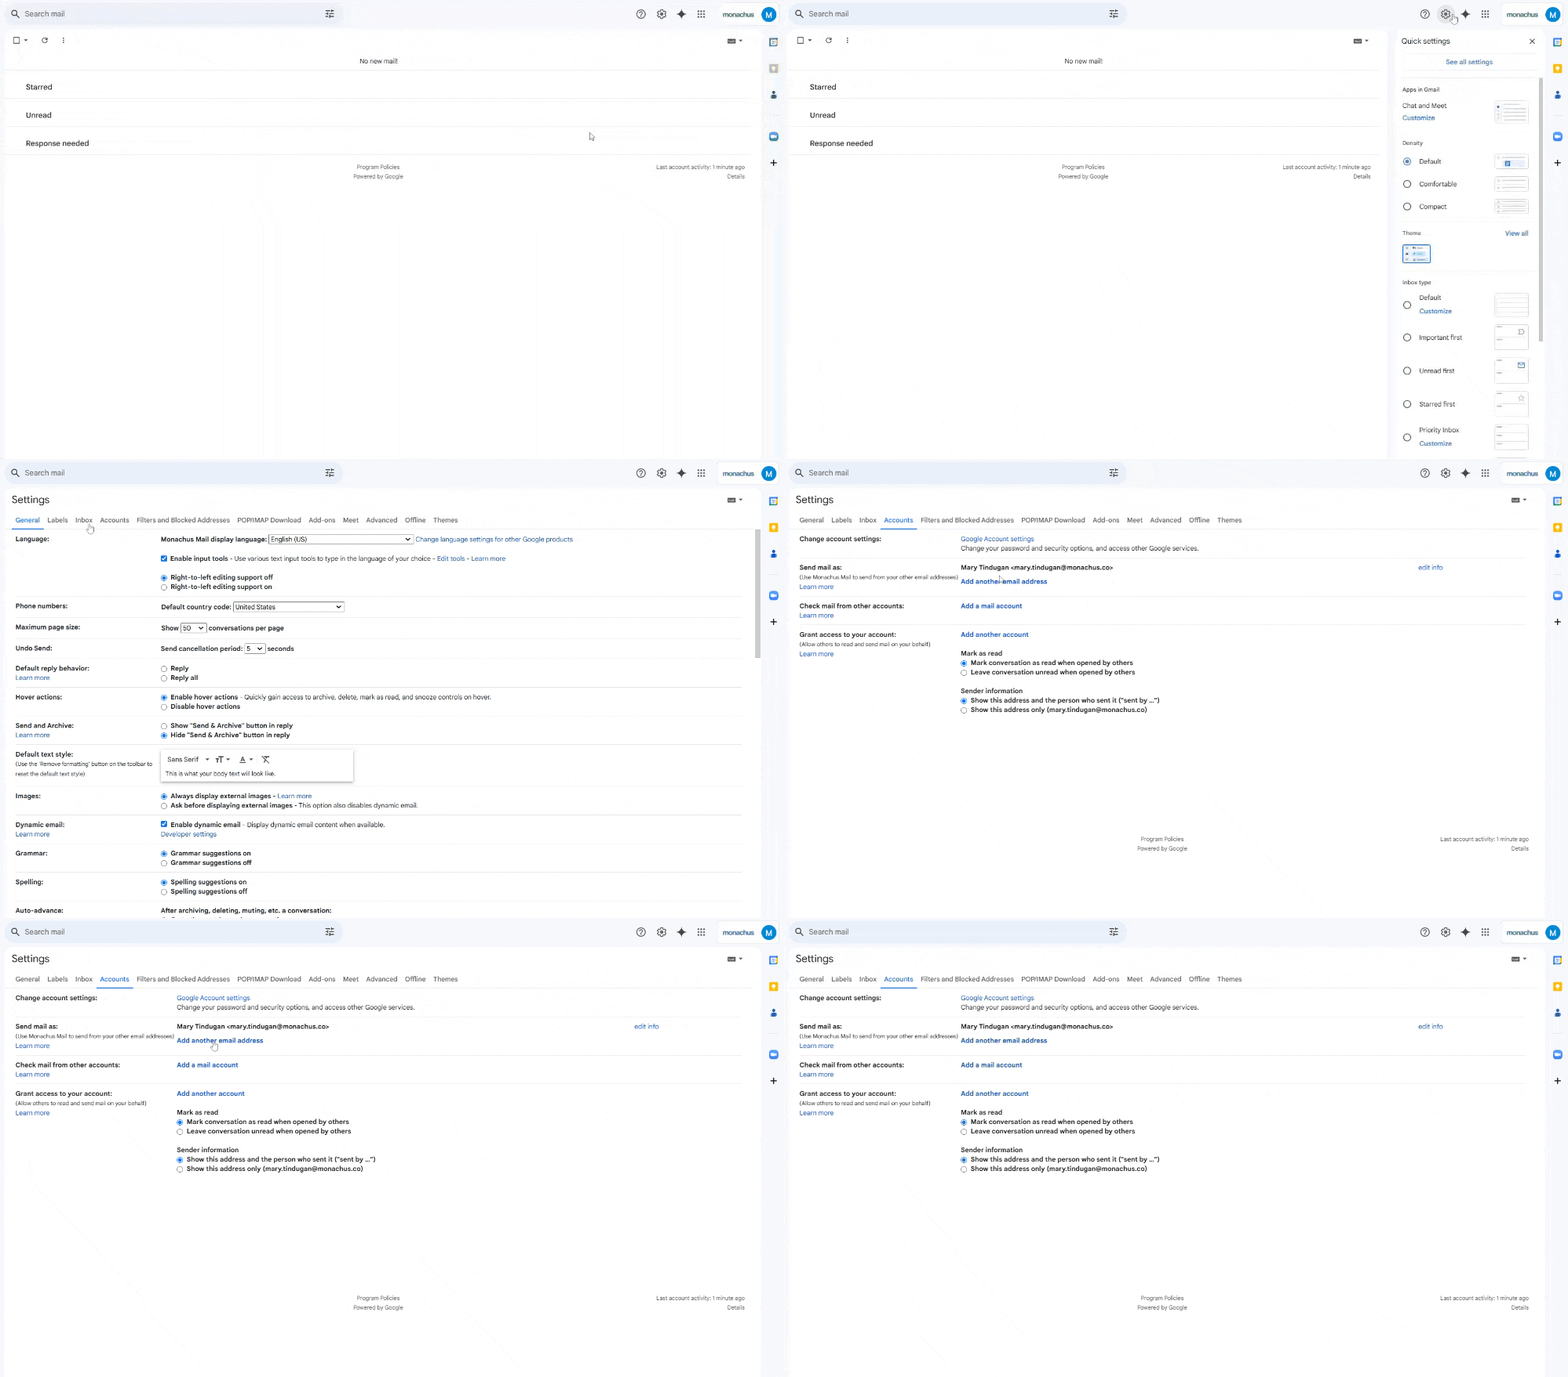
Step 1: On the top right corner of your google account, click on the gear icon.
Step 2: Click on See all settings
Step 3: Once in the settings panel, click on the account tab.
Step 4: Click on the “Add another email address” button in the “Send email as” section.

Step 5: There will be a popup window requesting your name and email address. Put the name of the alias and the new email created in the console.
Make sure the “Treat as an alias” option is on

Step 6: Hit the next step button and verify your new alias.
